
Using proxies in accounts
Assigning a proxy
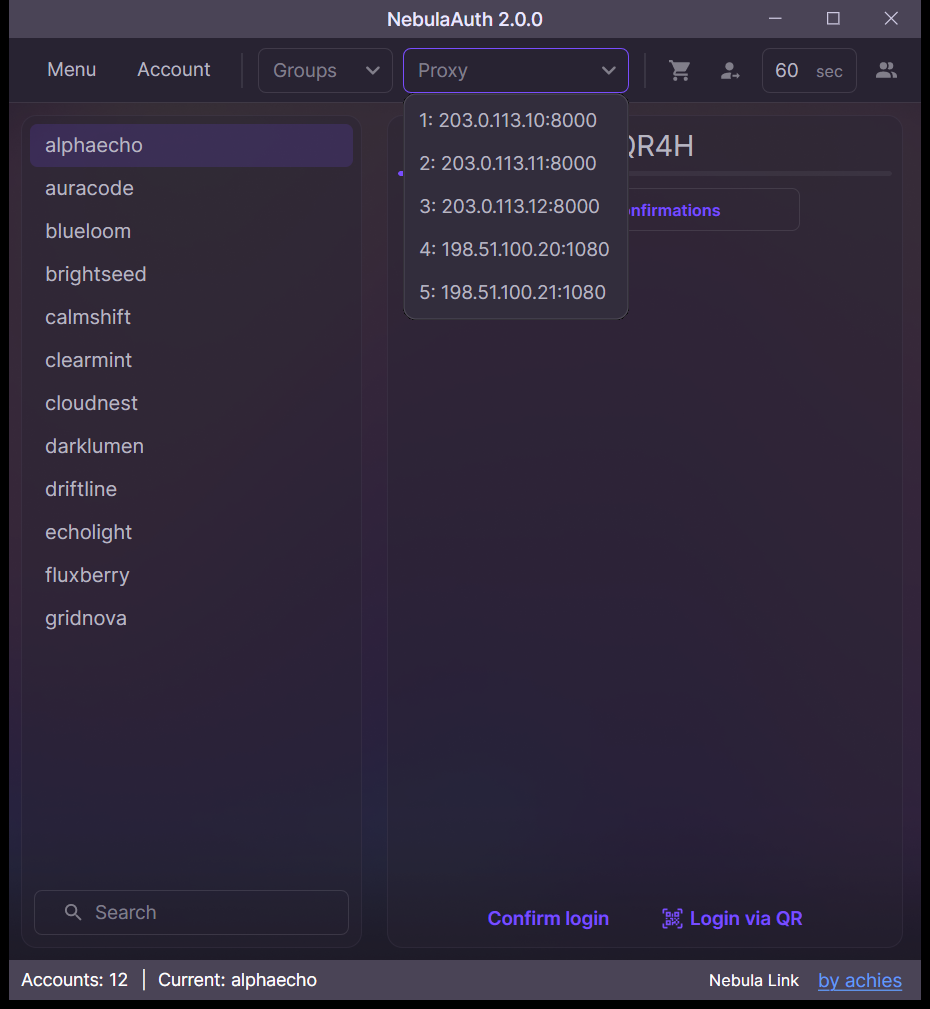
To assign a proxy to an account:
- Select the account
- In the "Proxy" field at the top, select the proxy from the dropdown list
When switching between accounts, you will see the assigned proxy.
To give an account a proxy that no other account uses, right-click the account and select Assign free proxy. To assign proxies to many accounts at once, use the Assignment tab of the proxy manager.
The proxy is stored inside the maFile, so it is preserved when you move the file between different NebulaAuth instances.
Where the proxy is used
The proxy is applied when the account works with:
- authorization and sessions
- confirmations
- auto-confirmations
Unattaching a proxy from an account
To unattach a proxy from an account:
Method 1:
- Click the "Proxy" field
- Press the DEL key
Method 2:
- Right-click the account
- Select "Unattach proxy"
After that, the account uses the default proxy if one is set, or connects directly.
Default proxy
If the account does not have its own proxy assigned, the default proxy is used.
account proxy → default proxy → directThis lets you define common network behavior and avoid direct connections.
Use during linking and transfer
When linking an account or transferring Steam Guard, you can select a proxy from the list.
The selected proxy:
- is used while the operation is running
- is automatically saved in the created maFile
Indicators in the interface
The interface displays proxy states:
- red, if the account has a proxy assigned but that proxy is missing from the manager
- yellow, if the account is using the default proxy